22.10.08
[Tutorial] 2D Fondant Flower

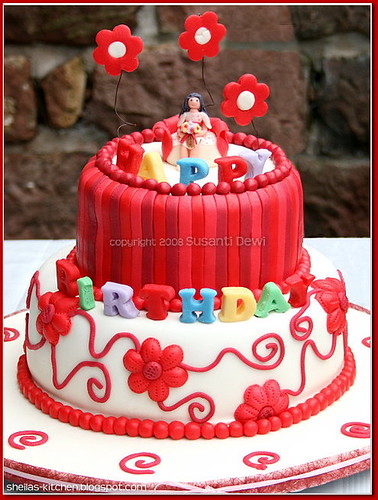
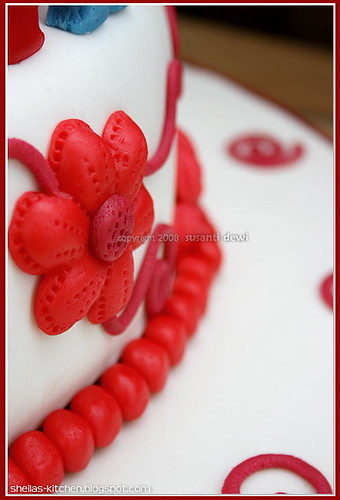
Foto di atas adalah hasil dekorasi yang aku persembahkan buatnya. Untuk berbagi kebahagiaanku, aku ingin memberi tutorial cara membuat 3D bunga fondant untuk teman-teman yang membutuhkan. Tapi, sebelumbya aku ingin minta maaf jika tutorialnya menggunakan bahasa Inggris. Semoga bermanfaat.
![3D Fondant Flower [Step 1-4]](http://farm4.static.flickr.com/3011/2963912818_dc3cbb4ed9.jpg)
A. Big & small flower cutter (small cutter is optional, because you can also shape it yourself).
B. Ridged fondant cutter/ embosser (if you dont have it, you can use tooth picks to make the mark, it might give you different mark).
C. Rolling pin
D. Fondant
2. Make a mark (or some) on the cake using the big flower cutter.
3. Roll out the fondant to the thickness you desire, press both cutters on it. Put it aside.
4. Devide the small cutter into each petal.
![3D Fondant Flower [Step 5-8]](http://farm4.static.flickr.com/3237/2963070147_a9b6083115.jpg)
6. Put the petals into the cake's mark. Give a little space on the top and in the middle.
7. Roll out the big flower cutter. Make it thinner than the small cutter.
8. Cover the whole cake's mark with big cutter.
![3D Fondant Flower [Step 9-12]](http://farm4.static.flickr.com/3292/2963912928_e5bd023164.jpg)
10. Mark the inner part of flower with ridged cutting wheel.
11. Mark the edges of flower too.
12. Don't forget to mark on the top of each petal (which I forgot, thanks to PhotoImpact that I can add it :D. Roll a small amount of fondant, put it in the middle of the flower.
It's done!

20 comments:
Shei... thanks banget info step by step nya nih...:)
thanks step by step-nya say
dirimu memang hebaaaatttttttt
semoga setelah ini, pesanan-pesanan selanjutnya akan berdatangan :)
btw, sptnya elo harus ganti warna huruf utk komen deh say, soalnya gue kalo mau baca komen orang, harus dihighlight dulu :)
atau emang mata gue aja nih yg sudah penuaan dini, wakakakakaka
dirimu memang hebaaaatttttttt
semoga setelah ini, pesanan-pesanan selanjutnya akan berdatangan :)
btw, sptnya elo harus ganti warna huruf utk komen deh say, soalnya gue kalo mau baca komen orang, harus dihighlight dulu :)
atau emang mata gue aja nih yg sudah penuaan dini, wakakakakaka
hebring ada step-by-step nya. semoga makin sukses yaa Sheil
mendukung usul Sefa u/ ganti warna huruf di bagian komen.
mendukung usul Sefa u/ ganti warna huruf di bagian komen.
Vielen dank Sheila, bener2 info yang bagus buat belajar. Pingin nyoba sosok Fondant tapi ditempatku nggak ada itu :(
Alles gute Sheila :D
Alles gute Sheila :D
Super.....keren banget sheila!. Aku kebayang aja, karyamu ini memerlukan kesabaran, ketelitian, ide, kreatifitas. Two thumbs for you. Semoga lancar pesanan selanjutnya ya.
cakeepp..., bener2 kreatif sheila..!!
semoga lancar orderannya ya..:)
semoga lancar orderannya ya..:)
Mak Sheila.... itu tangan lo dah lentur yah. eh apik tanan loh 3D flowernya. jadi pengen bikin gw (latah.com) tapi mana tahan gw gk punya kesabaran....:(
thanks buat tutorialnya yah.
thanks buat tutorialnya yah.
Ibu-ibu tercinta, makasih ya sama komennya. Aku jadi terharu. Badanku yang remuk abis ngedekor kue langsung seger lagi begitu liat reaksi orang-orang yang kuenya aku dekor :).
@ Sefa & Mindy: Waduh, untung aja dibilangin. Gue nggak tau, soalnya nggak utak-atik bagian komen. Ntar gue edit deh warnanya. Thanks ya.
@ Sefa & Mindy: Waduh, untung aja dibilangin. Gue nggak tau, soalnya nggak utak-atik bagian komen. Ntar gue edit deh warnanya. Thanks ya.
Setuju...gak percuma kamu bergadang San...pokoknya happy baking dan jangan surut untuk terus berkreasi...
baguuussss banget mbaaa!!! gak kebayang bikin salur2 atasnya itu, diukur pake penggaris ya mba biar sama lebarnya?
wow sheil....saluttttttt aku nyerah duluan hehehehe mungkin ntar kalo dah bisa lebih jago baking...sekarang ini cuman baru bisa bikin muffin tok hehehe
wow..komplit banget. Pantesan hasilnya cantik banget. Rapi lagi. Itu alatnya (fondant embosser) mirip alat yang di pake tukang jahit ya. thanks for sharing.sukses terus ya mbak Sheila..;)
nice...great...
thanks buat infonya
perlu dicoba ni...
thanks buat infonya
perlu dicoba ni...
Duuuh....3D flower-nya cakep banget. Jadi pengen maen-maen dgn fondant juga euy... Thanx tutorialnya ya, berguna banget deh. Good job!
Ikut ngerasain, senangnya ada yang minta didekor cake-nya. Aku jg pernah ngerasin begitu, senaaang banget. Moga berlanjut dgn pesanan berikutnya ya mbak... :)
Ikut ngerasain, senangnya ada yang minta didekor cake-nya. Aku jg pernah ngerasin begitu, senaaang banget. Moga berlanjut dgn pesanan berikutnya ya mbak... :)
wow.. keren.. ini pk fondant apa pk marsipan ? jos gandhos banget.. next time bs dicontek
waduh, ternyata sibuk bikin tutorial toh Sheil? pinter sekali kamu utk bidang dekorasi kue....
sheillll keren booww, kapan ya gue bisa hihihihi...tar gue contek yaa
Sheila... ada award utk mu.
Sheila... Salute sama kesabaran mu...
Terima kasih untuk tutorial nya juga yang "kemaren"...
Terima kasih untuk tutorial nya juga yang "kemaren"...


dakuw kagum setengah mati pada-mu, pada cake-mu, pada decor-mu dan pada kesabaran-mu.
hebad!pasti bakal datang pesenan2 berikutnya. Good luck Shel.